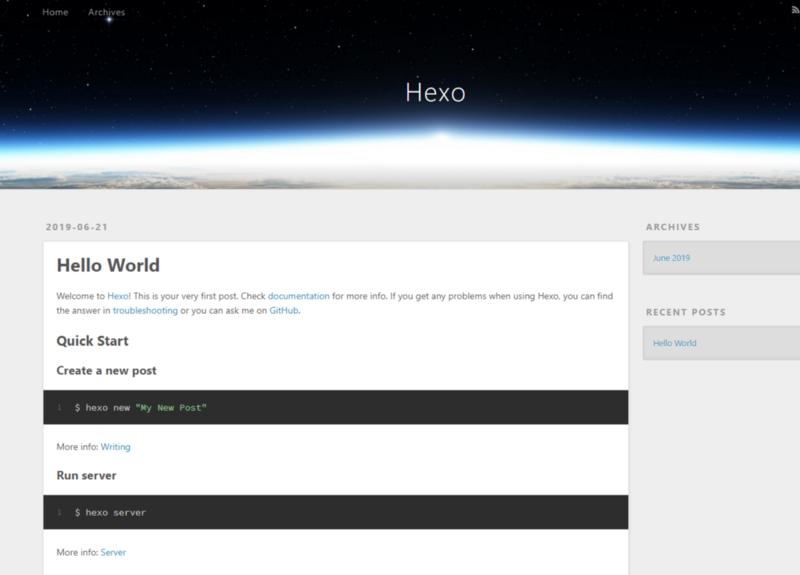
Hexo is a framework built with nodejs to create a blog quickly and easily. Like wordpress or other blog platforms, articles and content are not stored in databases but the form of files written with the markdown language. These Markdown files will then be compiled into html files.
Like any application nodejs, there are several commands to create a page, a post, a category, generate static files, deploy on a server:
- git
- heroku
- netlify
- rsyncSFTP
- SFTP.
If you want to change platforms – for example from wordpress, Jekyll, octopress, joomla to Hexo or import an rss stream, this is also possible.
Installation
Prerequisites
Let’s install nodejs if it’s not already done.
- nodejs
If not done yet, the installation is very simple. On Windows, go to sur https://nodejs.org/en/ and download the installer.

We then check the correct node installation by typing this in the console:
node -v
v12.4.0
Installation of Hexo
We install hexo-cli in global
npm i hexo-cli -gReturn from the console
+ hexo-cli@2.0.0Create a Hexo application in a blognodejs folder
hexo init blognodejsWe go into this folder and set up the dependencies.
cd blognodejs/
npm install
We want to immediately generate static files (.html, css, javascript) in the public folder. It is the contents of this folder that will need to be sent in an FTP space for the blog to be accessible via a URL. Just run this command.
hexo generateIf we wanted to automatically generate . html files after their creation/modification – we add the parameter –watch
hexo generate --watchBefore deploying the blog to a production server, let’s first observe the local rendering.
Hexo has a server that allows us to see this easily. All you have to do is run:
hexo server --draft --openThe parameter is:
- –draft allows displaying drafts (because they are hidden by default)
- –open launches browser and opens http://localhost:4000 when the server is ready
If the 4000 port is already used by another instance, you can choose another port by passing the -p parameter like this
hexo server -p 4500
INFO  Start processing
INFO  Hexo is running at http://localhost:4500 . Press Ctrl+C to stop.
To view the list of existing URLs.
hexo list pageHere is the return of this order
INFO  Start processing
Date        Title          Path
2019-06-21  About me       about/me.md
2019-06-21  Bonjour        bonjour.md
2019-06-21  Bonjour Miary  hello/miary.md
A little sneak peeks at the blog.

We now want to display a dynamic menu on all the pages of the blog.
Let’s create a case file.
mkdir -p source/_dataAnd let’s add a menu.yml file to this folder.
touch source/_data/menu.ymlwhich will contain the following code.
Accueil: /
Photos: /photos/
Articles: /archives/- Left (of the “:”): the menu title
- Right (from “:”): Destination URL
Display these menus on all pages. To do this, modify/themes/landscape/layout/_partial/header.ejs and add
<% for (var link in site.data.menu) { %>
<a href="<%= site.data.menu[link] %>"> <%= link %> </a>
<% } %>
Here is the result

Plugins
As in wordpress, it is possible with Hexo to install plugins to add useful features to our needs.
We would need the following plugins at first:
- hexo-browsersync
- hexo-lazyload-image
- hexo-wordcount
hexo-browsersync
Because we don’t want to refresh the page every time we make a change, we’ll let the browser do that. We need to install the next package.
npm install hexo-browsersync --saveStop the server again by doing (CTRL+C) then run it again via the following command:
hexo serverhexo-lazyload-image
Allows presenting a loading icon before the actual display of an image.
We install
npm install hexo-lazyload-image --saveIn the/_config.yml file, add the plugin parameters
lazyload:
  enable: true
  onlypost: false
  loadingImg: # eg ./images/loading.gif
Stop the server again by doing (CTRL+C) then run it again via the following command:
hexo serverAnd from there, a loading icon appears before presenting the image.

hexo-wordcount
Allows adding useful information to a post for example the number of words, the estimated reading time.
We install
npm install hexo-wordcount --saveDeployment
We finished writing our first post. It’s time to send this to a server because the article needs to be read fairly quickly.
We need to make a few changes before we launch the deployment.
In our case, we will push (git push) the source code on Gitlab . Then a Webhook will contact our server to pull (git pull) commits.
Let’s install the hexo-deployer-git plugin to deploy via git
npm install hexo-deployer-git --saveLet’s change the/_config.yml file and add this
deploy:
  type: git
  repo: git@gitlab.com:miary/hexo.git
  branch: prod
  message: # messg laisser vide - par défaut "Site updated: {{ now('YYYY-MM-DD HH:mm:ss') }}"
Then let’s start the deployment
hexo clean && hexo deployReturn
INFO  Deleted database.
INFO  Deleted public folder.
INFO  Start processing
INFO  Files loaded in 575 ms
INFO  Generated: index.html
INFO  Generated: archives/index.html
...
INFO  17 files generated in 1.39 s
* Bonus
Write in Markdown
As stated above, pages must follow the Markdown format. It is not easy at first to learn this language although it is practical and simple when you get used to it.
A free online tool wysiwyg (What You See Is What You Get) exists to help us write Markdown. This tool is called stackedit .
Markdown Plugins
I mainly use PHPSTORM as IDE. I have added 2 plugins that help me write Markdown:
- Markdown Navigator :
Markdown editor more complete than the default editor offered by the software. Additional toolbars allow you to: add links, tables, bulleted lists… - Paste Image To Markdown
Allows to add a copied image and save this image in a specific folder.
Bookmarks and Webography
[UPDATED] – View this article: